Single plane balancing
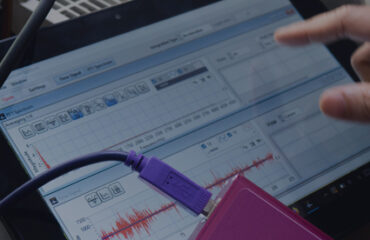
Attach the Vibration sensor on any of the bearing blocks of the rotor. Set up an angle sensor or a tachometer to track RPM and angular position in relation to a zero reference location. In the ‘Settings’ panel, select appropriate acquisition settings for the T-Vib Balancing module, and set the number of planes to a single plane. Then click ‘Start Balancing’ to begin the balancing process.
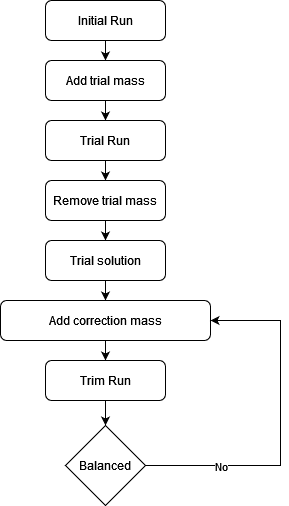
Step 1 – Initial Run

Make sure your hardware is configured, and your vibration sensor and tachometer are positioned correctly on your machine. Note the initial zero phase position with the tachometer. Start data acquisition by pressing the ‘Measure’ button when your machine is running at the desired speed. After the completion of the acquisition process, the values and polar plot will be updated. Then click next to proceed to the next step
Step 2- Trial Run
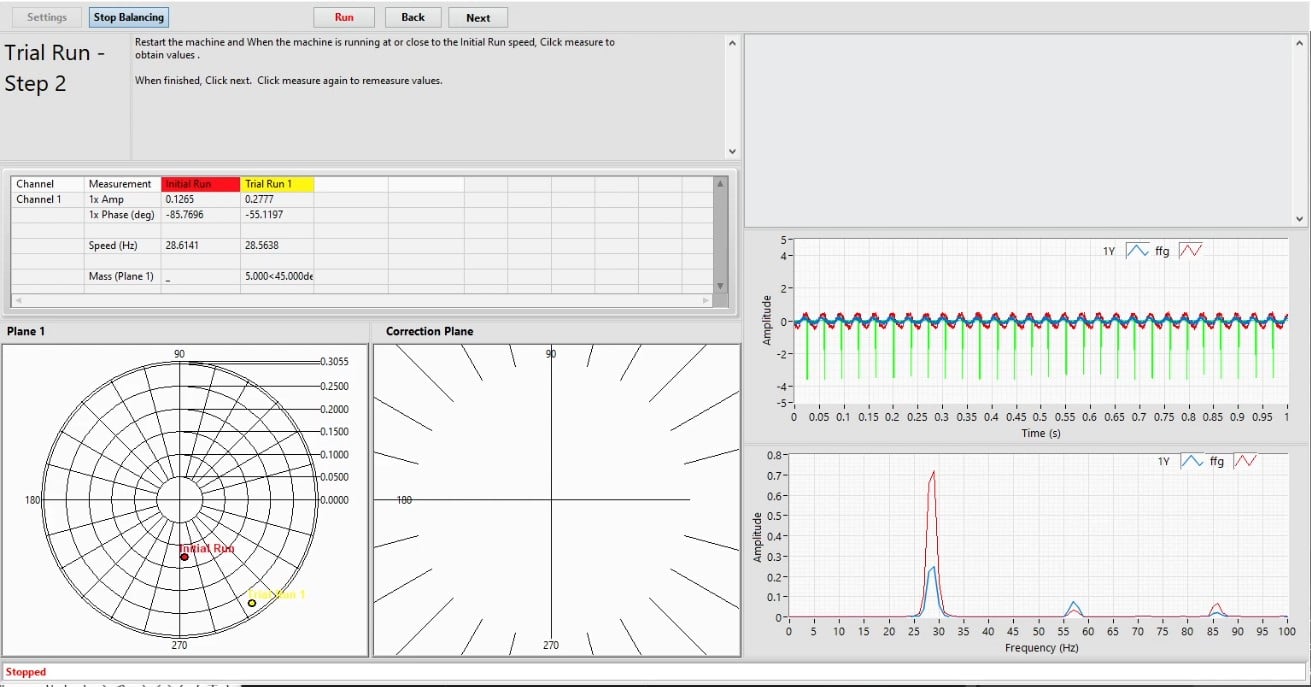
Stop the machine and add trial weights with known values at any position of the rotor. To initiate the Trial Run acquisition procedure, enter trial weight information in grams in the appropriate areas and click next. Restart the machine and When the machine is running at or close to the Initial Run speed, Click measure to obtain values. Following the completion of the acquisition, To move on to the next step, click next.
Step 3 – Trial Solution
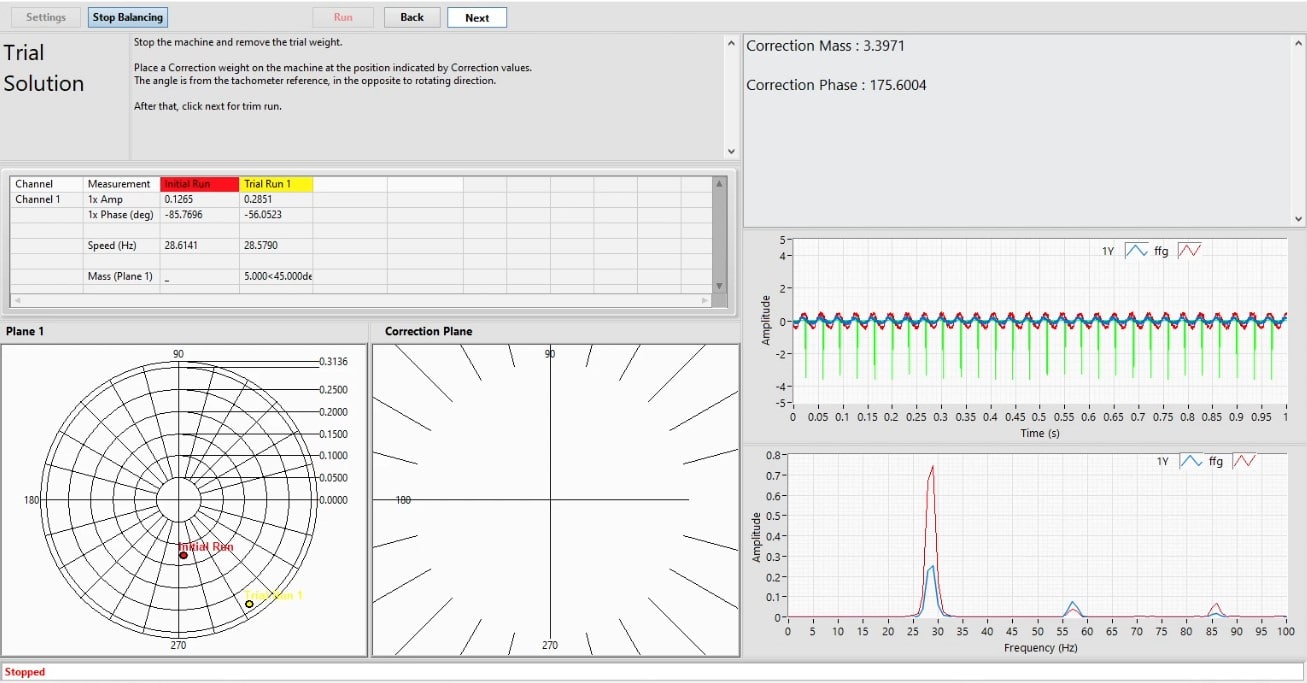
Stop the machine and remove the trial weight. The top right section will show the value of corrective weight in grams that need to be added to achieve the balanced rotor. Place a Correction weight on the machine at the position indicated by Correction values. The angle is from the tachometer reference, in the opposite rotating direction.
Step 4- Trim Run
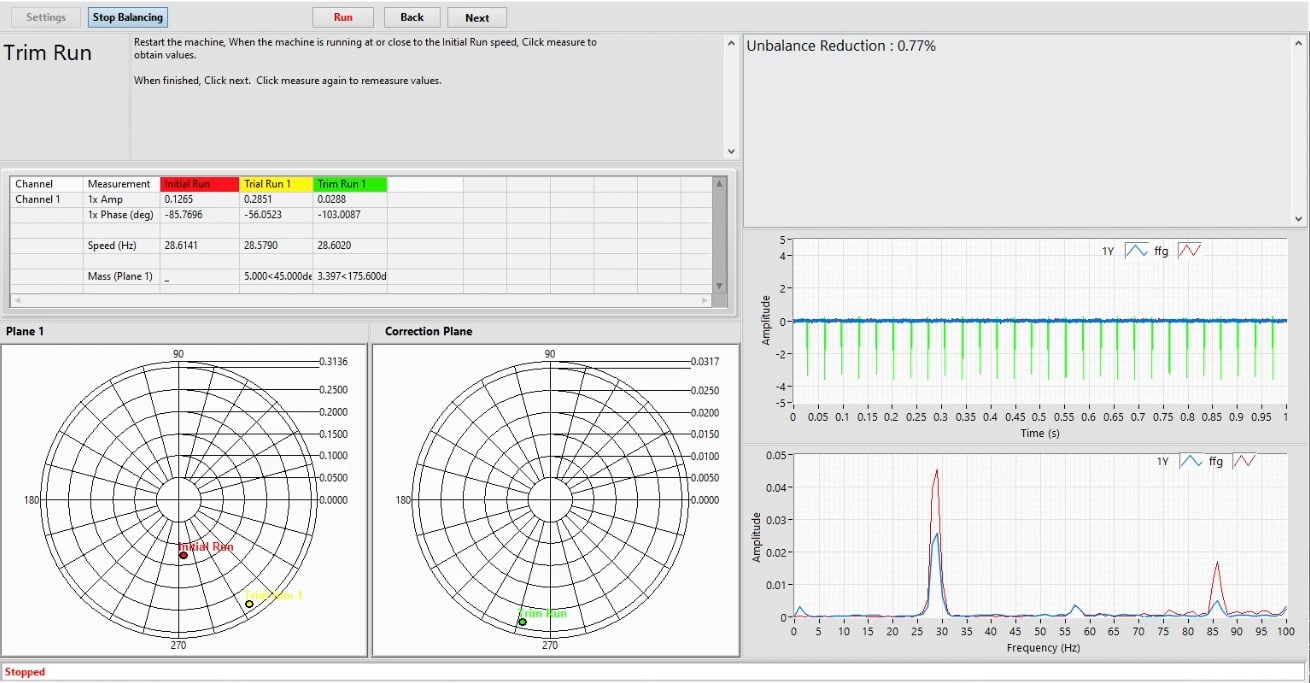
Restart the machine, When the machine is running at or close to the Initial Run speed, Click measure to obtain values. The newly added correction weights will counterbalance the unbalanced state of the rotor, thus achieving reduced vibration. The vibration status of the balanced rotor will be updated on the indicators, which the user can check before determining whether or not to continue with more corrective weights and Trim Run.
To continue for more Trim Run and solutions, click next.
Dual plane balancing
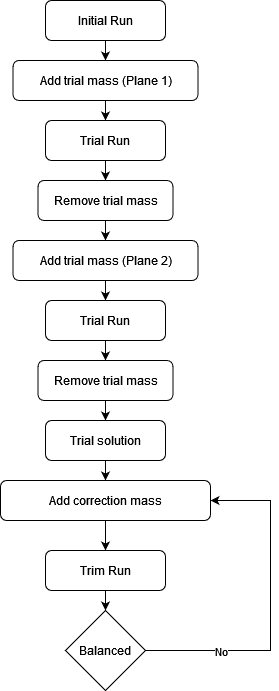
Attach the Vibration sensors on both of the bearing blocks on either side of the rotor plane. Set up an angle sensor or a tachometer to track RPM and angular position in relation to a zero reference location. In the ‘Settings’ panel, select appropriate acquisition settings for the T-Vib Balancing module, and set the number of planes to the dual plane. Then click ‘Start Balancing’ to begin the balancing process.
Step 1 – Initial Run
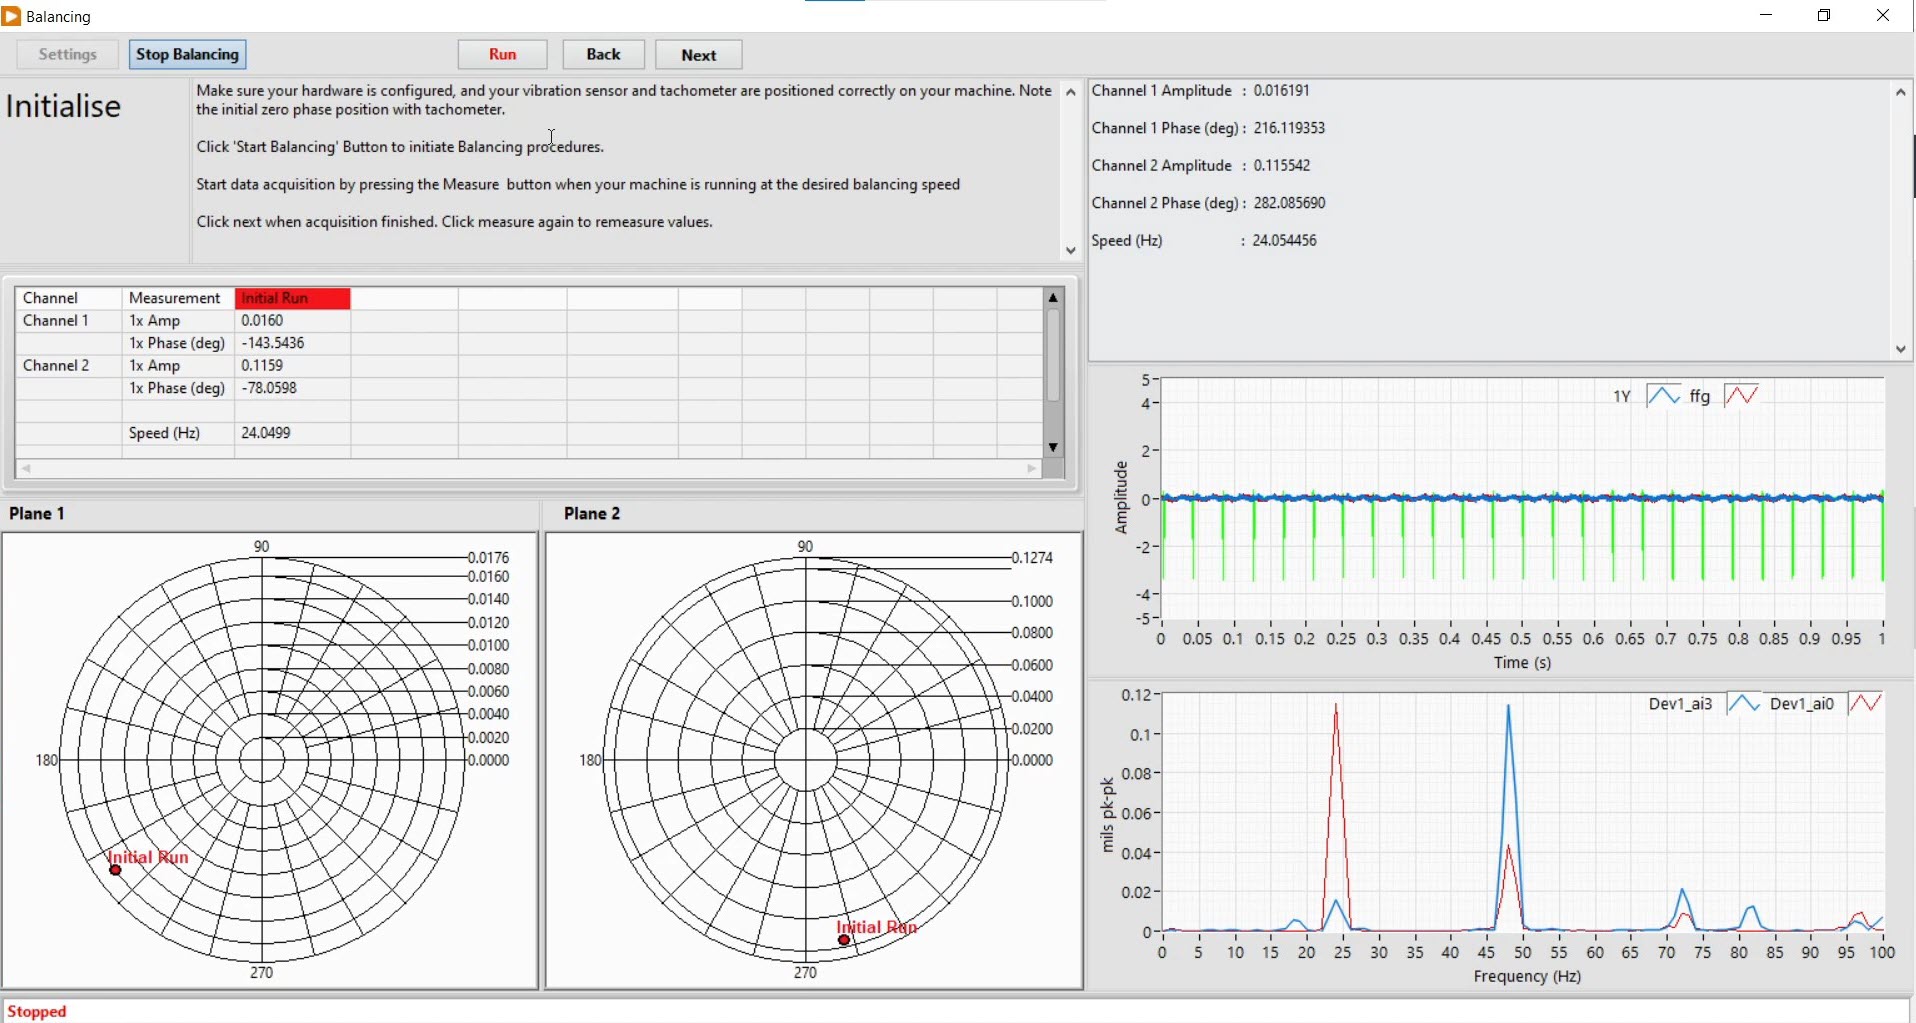
Make sure your hardware is configured, and your vibration sensor and tachometer are positioned correctly on your machine. Note the initial zero phase position with the tachometer. Start data acquisition by pressing the ‘Measure’ button when your machine is running at the desired speed. After the completion of the acquisition process, the values and polar plot will be updated for plane 1 and plane 2. Then click next to proceed to the next step
Step 2- Trial Run 1
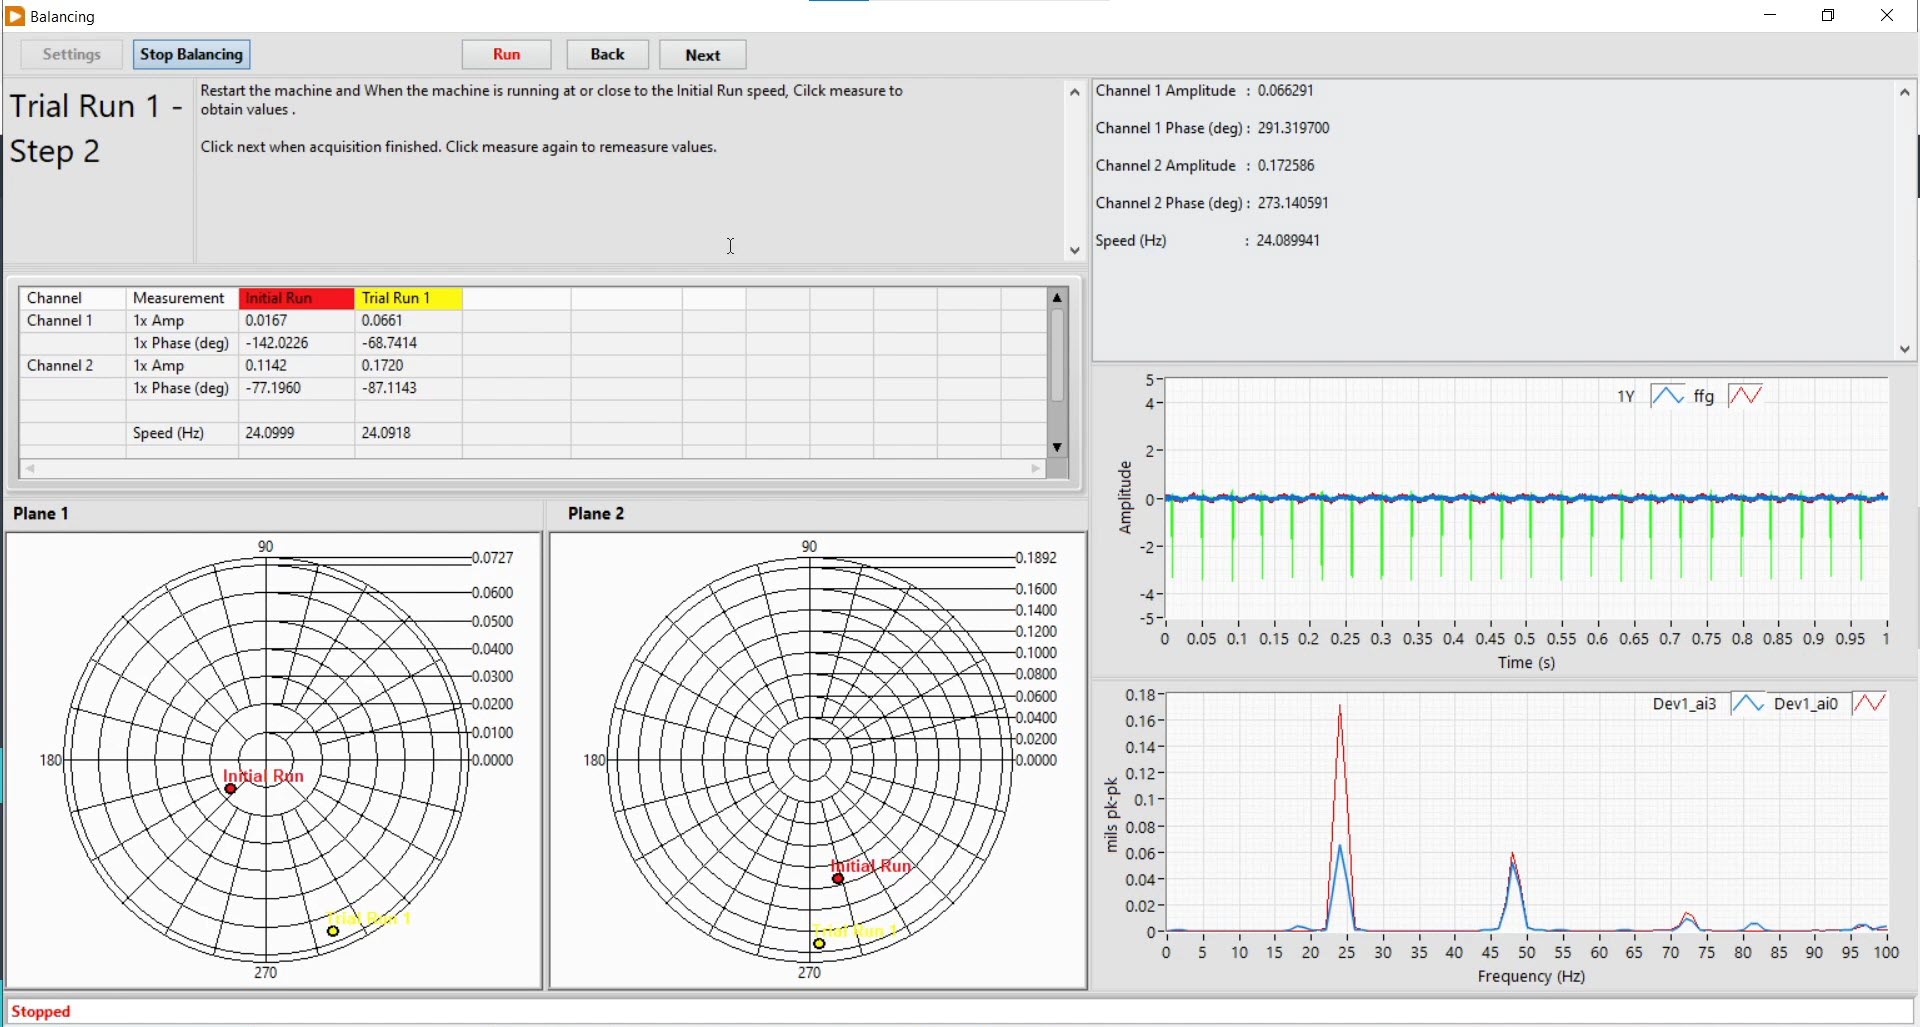
Stop the machine and add trial weights with known values at any position of the first rotor plane. To initiate the Trial Run acquisition procedure, enter trial weight information in grams in the appropriate areas and click next. Restart the machine and When the machine is running at or close to the Initial Run speed, Click measure to obtain values.
Following the completion of the acquisition, To move on to the next step, click next.
Step 3- Trial Run 2
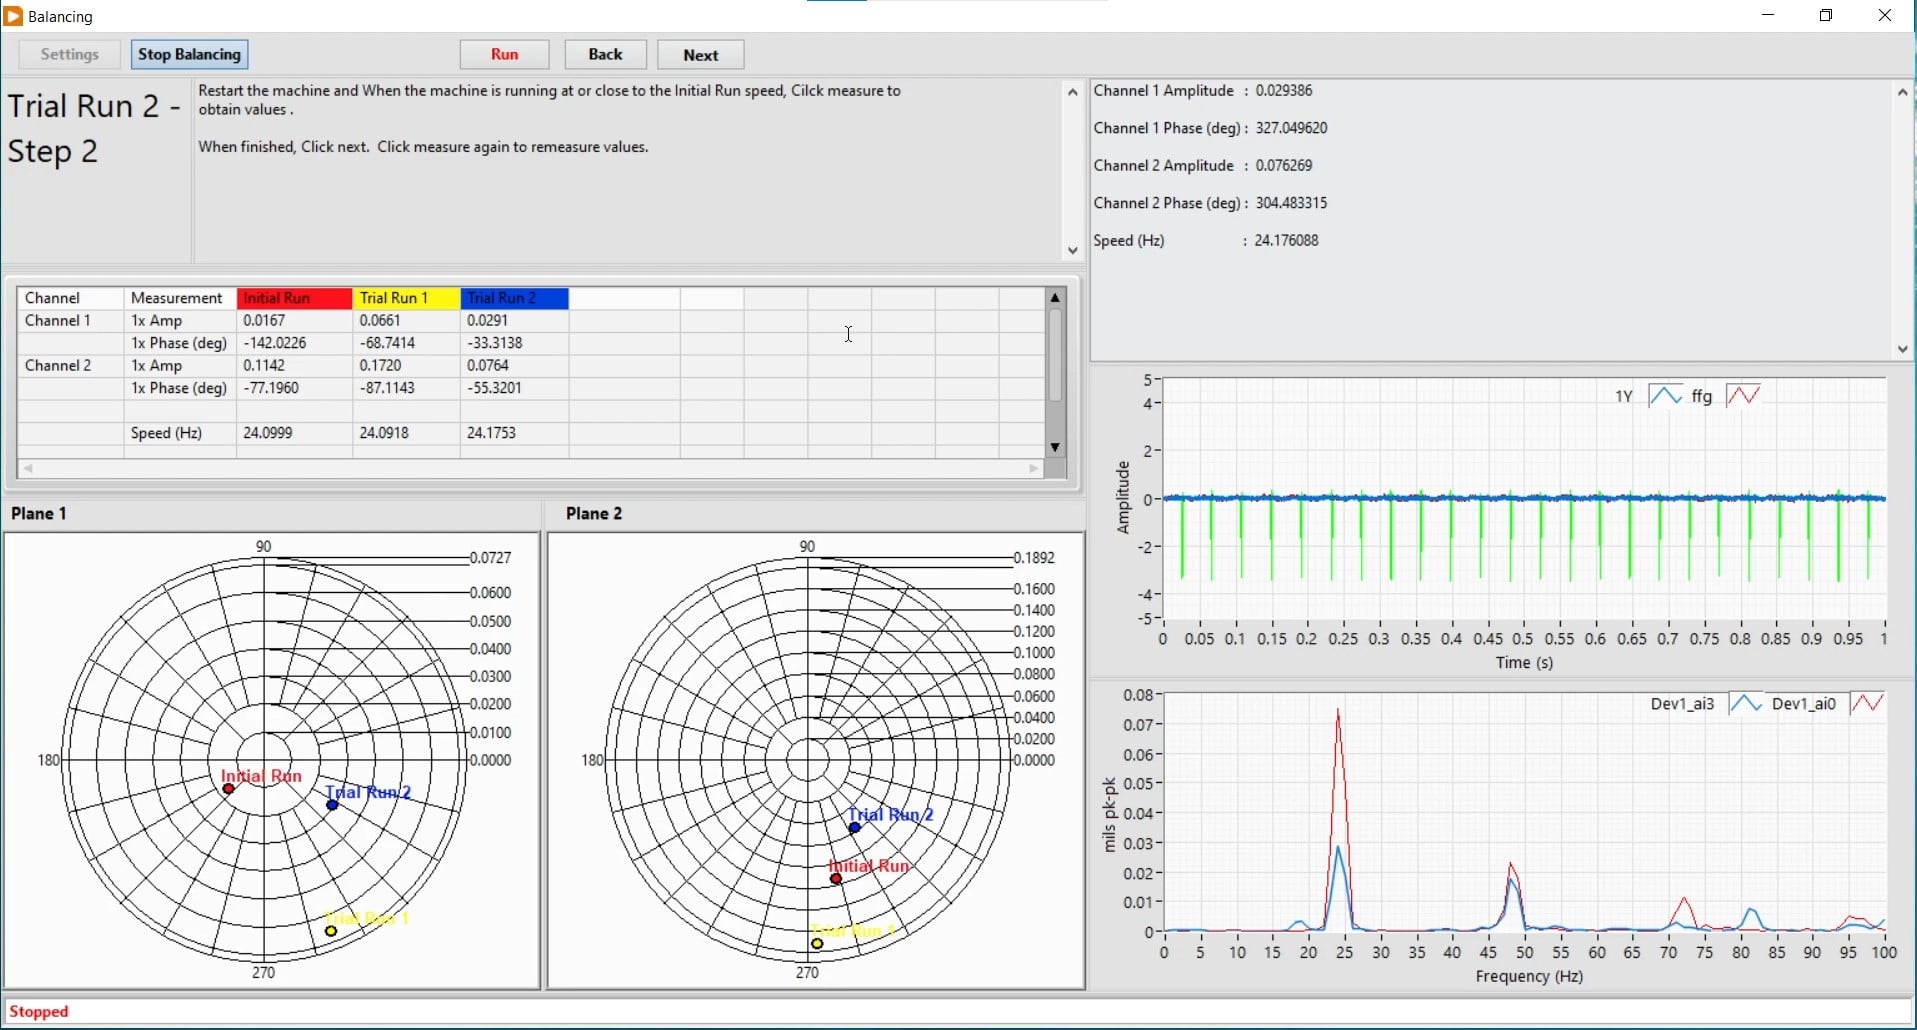
Stop the machine and remove the trial weights from Plane 1. Then add trial weights with known values at any position of the second rotor plane. To initiate the Trial Run acquisition procedure, enter trial weight information in grams in the appropriate areas and click next. Restart the machine and When the machine is running at or close to the Initial Run speed, Click measure to obtain values. Following the completion of the acquisition, To move on to the next step, click next.
Step 3 – Trial Solution
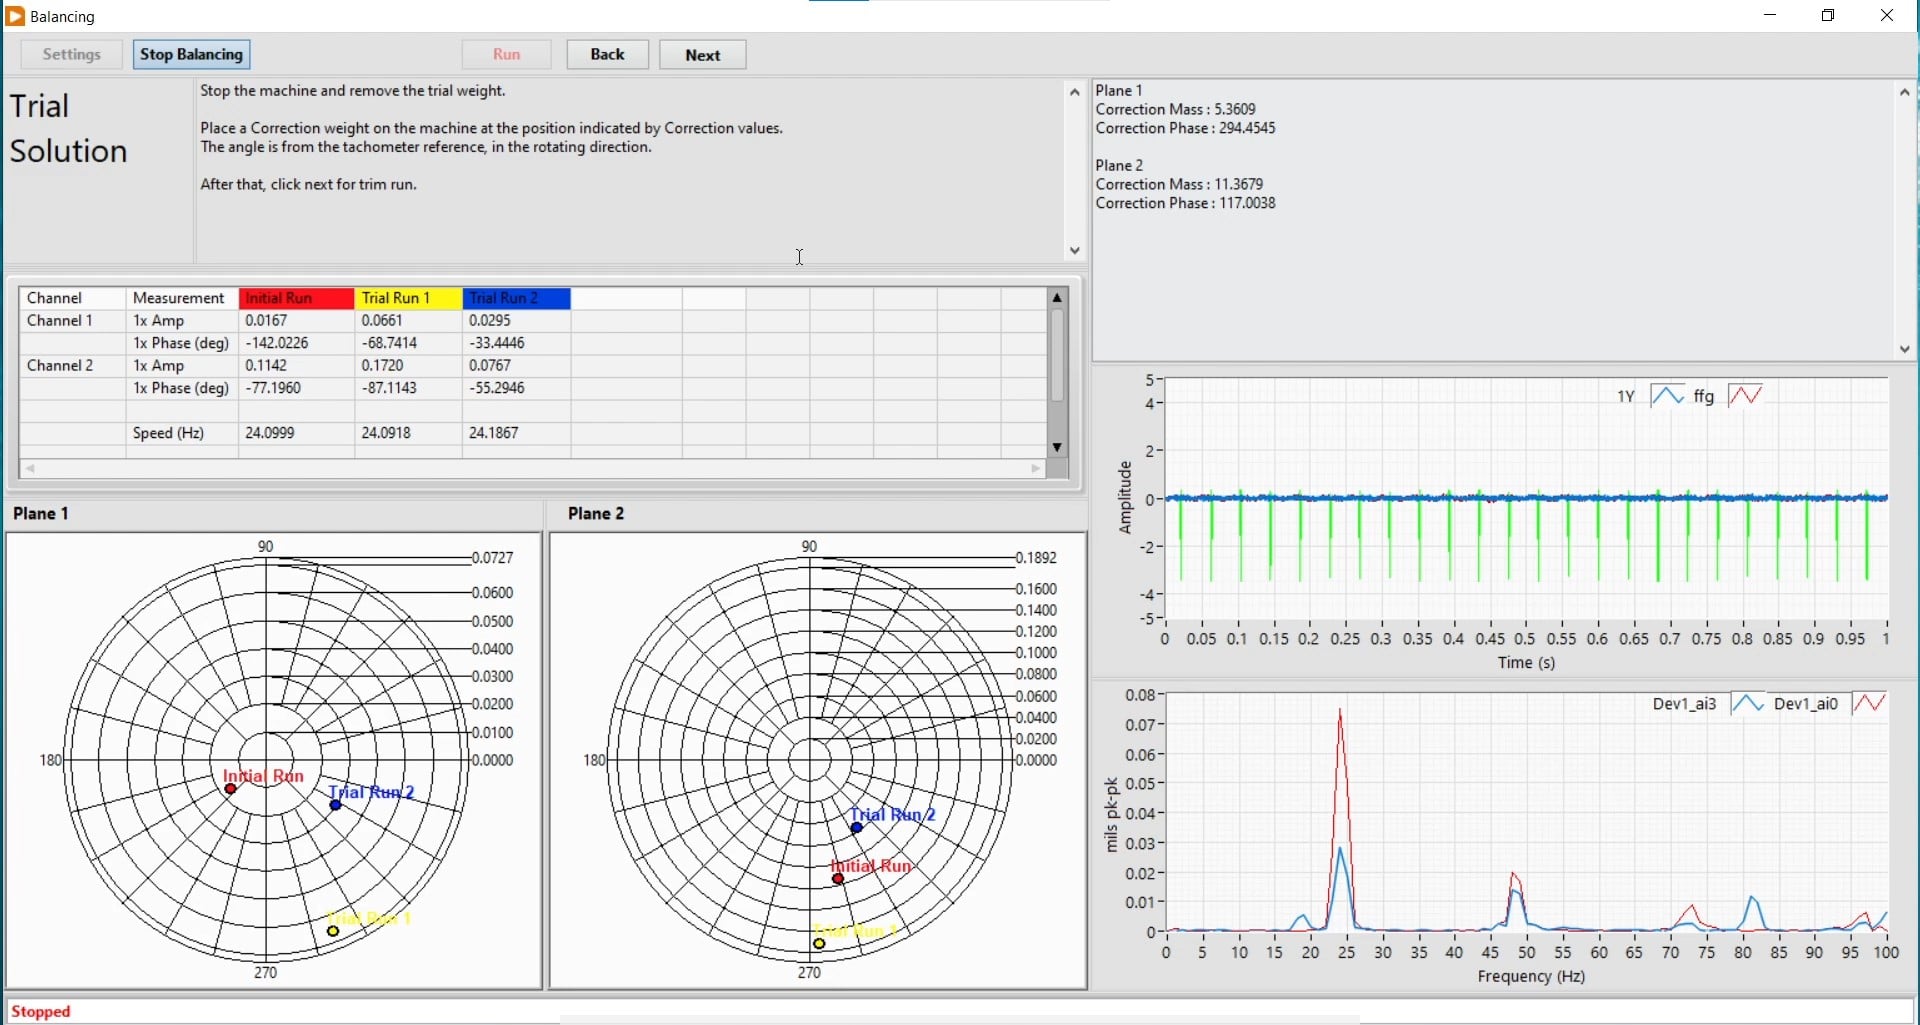
Stop the machine and remove the trial weight. The top right section will show the value of corrective weights in grams that need to be added for achieving the balanced rotor.
Place a Correction weight on the machine at the position indicated by Correction values.
The angle is from the tachometer reference, in the opposite to rotating direction.
Step 4- Trim Run
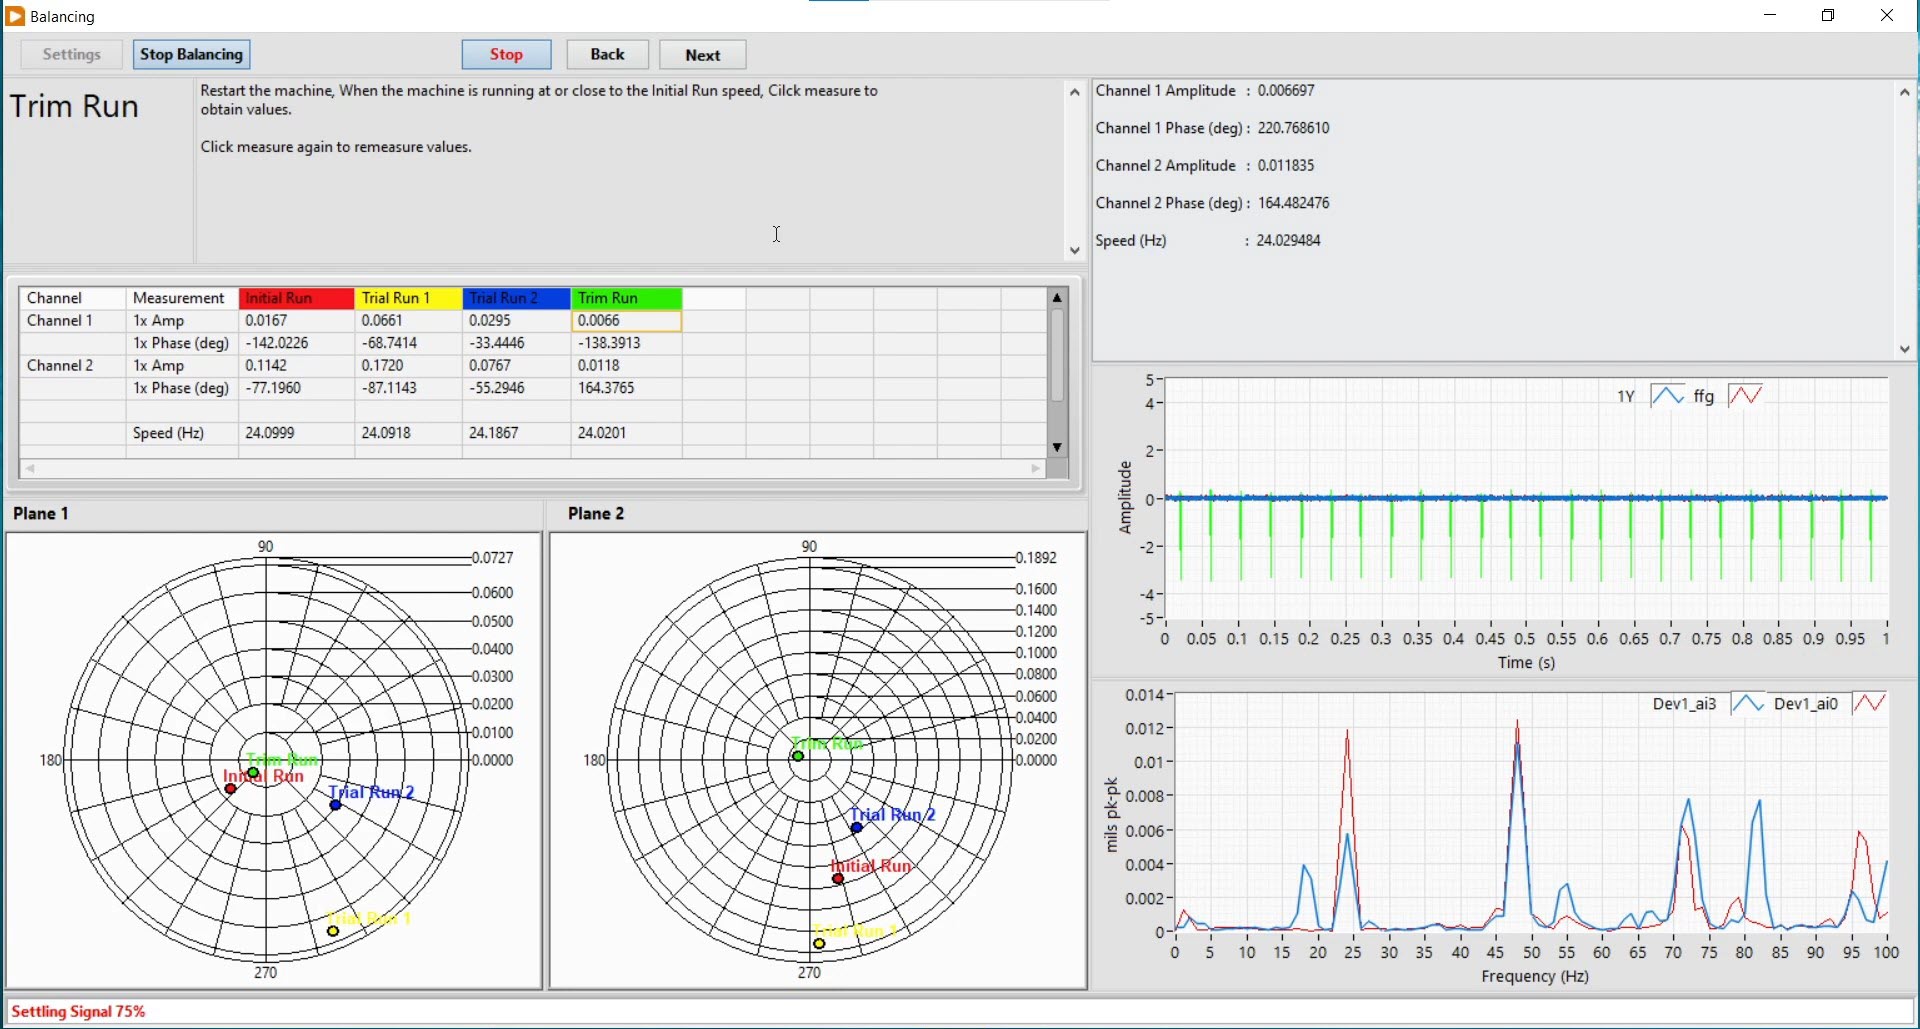
Restart the machine, When the machine is running at or close to the Initial Run speed, Click measure to obtain values. The newly added correction weights will counterbalance the unbalanced state of the rotor, thus achieving reduced vibration. The vibration status of the balanced rotor will be updated on the indicators, which the user can check before determining whether or not to continue with more corrective weights and Trim Run. To continue for more Trim Run and solutions, repeat the process starting with newly added correction weights.